This is a step-by-step to updating X-Setup with new wizards and plug-ins using X-Update.
First, make sure you are connected to the internet, and that any other X-Setup programs are not
running. To start it, start the "Xteq Systems X-Setup Welcome" link using the
Start -> Programs menu. Inside the "Welcome to Xteq Systems X-Setup" screen,
click the "X-Update for X-Setup" link.
Each time you start X-Update, the program will retrieve a list of plug-ins and wizards from Xteq Systems' web site (which is why you need to be connected to the internet). The following dialog will be shown while this happens:

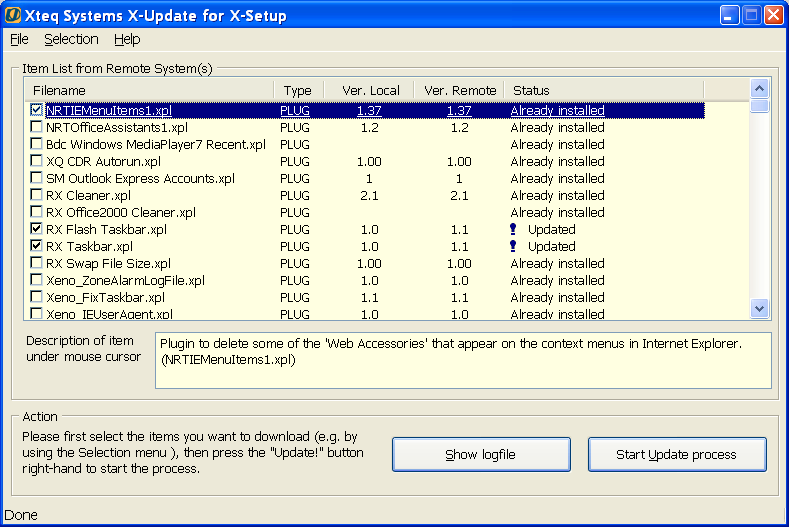
Once the list of downloadable items has downloaded, you will see the following dialog (or something similar):

Place a checkmark besides the items you want to download (scroll down for more items), and then click on 'Start
Update process'. X-Update will now download the files and install them into X-Setup.
X-Update will show the download dialog again, but this time it will download, decompress and install each file you have selected.
Once X-Update has downloaded and installed all the necessary files, you will receive a message confirming that the files have been installed correctly.
All you need to do is close X-Update, launch X-Setup and run the new plug-ins/wizards you have downloaded. Note: Some plug-ins may have been created by third-party authors, and may cause harm to your system. Therefore, Xteq Systems recommends you activate Safe Mode before using these plug-ins.